Intro
The following story is inspired by a recent case I had to troubleshoot at work. I think it is a nice example of troubleshooting Linux networking issues, so I’ve modified/simplified the setup a bit to be able to reproduce it on a VM. I’ll go through the troubleshooting steps in almost the same way we handled the actual case. Service names, IPs, ports, etc are all different that the real case as the focus should not be the example itself but the process.
It all started a few days ago when I was asked to help on an “unusual” case. Docker containers on every single host of an installation could not establish connections towards services that listen on the “main” IP of the host they run on, nor can they ping that IP, but the containers have full access to the internet and can connect to the service ports on other hosts in the LAN. As everyone who has done even a tiny bit of support, asking whether something changed recently in the setup is always replied back with a single global truth: “nothing has recently changed, it just stopped working”.
Challenge accepted!
Reproduction setup
For reproduction purposes I’ve used a VM with one ethernet interface, and a docker bridge. In this VM I have injected the same problem as with the real case. Even though the real case case was a bit more complicated, to make following the post somewhat easier, I’ve used only one service listening on the host, an Elasticsearch process, and only one Kibana docker container that needs to communicate with Elasticsearch on the host.
Troubleshooting process
Host interfaces:

2: ens5: <BROADCAST,MULTICAST,UP,LOWER_UP> mtu 9001 qdisc mq state UP group default qlen 1000
    link/ether 06:ce:3b:94:fe:ac brd ff:ff:ff:ff:ff:ff
    inet 172.31.45.100/20 brd 172.31.47.255 scope global dynamic ens5
       valid_lft 3572sec preferred_lft 3572sec
    inet6 fe80::4ce:3bff:fe94:feac/64 scope link
       valid_lft forever preferred_lft forever
3: docker0: <BROADCAST,MULTICAST,UP,LOWER_UP> mtu 1500 qdisc noqueue state UP group default
    link/ether 02:42:e9:38:3d:a8 brd ff:ff:ff:ff:ff:ff
    inet 172.17.0.1/16 scope global docker0
       valid_lft forever preferred_lft forever
    inet6 fe80::42:e9ff:fe38:3da8/64 scope link
       valid_lft forever preferred_lft forever
Kibana’s config has the following ENV variable set ELASTICSEARCH_HOSTS=http://172.31.45.100:9200, and for simplification purposes let’s assume that this IP could not be changed.
As originally described, curl from the container towards the service IP:port does not work
(container) bash-4.2$ curl -v 172.31.45.100:9200
* About to connect() to 172.31.45.100 port 9200 (#0)
*   Trying 172.31.45.100...
it just hangs there without error. There’s no DNS resolution involved here, straight curl towards the IP:port
Let’s check if the service is actually listening on the host
[root@ip-172-31-45-100 ~]# ss -ltnp | grep 9200
LISTEN      0      128                             [::]:9200                                  [::]:*                   users:(("java",pid=17892,fd=257))
The service listens on 9200. Since the service listens on all interfaces, let’s curl from the container towards the service IP:port on the docker0 interface.
bash-4.2$ curl -v 172.17.0.1:9200
* About to connect() to 172.17.0.1 port 9200 (#0)
*   Trying 172.17.0.1...
* Connected to 172.17.0.1 (172.17.0.1) port 9200 (#0)
> GET / HTTP/1.1
> User-Agent: curl/7.29.0
> Host: 172.17.0.1:9200
> Accept: */*
>
< HTTP/1.1 200 OK
< content-type: application/json; charset=UTF-8
< content-length: 524
<
{
  "name" : "node1",
  "cluster_name" : "centos7",
  "cluster_uuid" : "d6fBSua6Q9OvSu534roTpA",
  "version" : {
    "number" : "7.7.0",
    "build_flavor" : "default",
    "build_type" : "rpm",
    "build_hash" : "81a1e9eda8e6183f5237786246f6dced26a10eaf",
    "build_date" : "2020-05-12T02:01:37.602180Z",
    "build_snapshot" : false,
    "lucene_version" : "8.5.1",
    "minimum_wire_compatibility_version" : "6.8.0",
    "minimum_index_compatibility_version" : "6.0.0-beta1"
  },
  "tagline" : "You Know, for Search"
}
that works, so the service is running properly. Curl-ing the service from the host using the host’s IP also works
[root@ip-172-31-45-100 ~]# curl http://172.31.45.100:9200
{
  "name" : "node1",
  "cluster_name" : "centos7",
  "cluster_uuid" : "d6fBSua6Q9OvSu534roTpA",
  "version" : {
    "number" : "7.7.0",
    "build_flavor" : "default",
    "build_type" : "rpm",
    "build_hash" : "81a1e9eda8e6183f5237786246f6dced26a10eaf",
    "build_date" : "2020-05-12T02:01:37.602180Z",
    "build_snapshot" : false,
    "lucene_version" : "8.5.1",
    "minimum_wire_compatibility_version" : "6.8.0",
    "minimum_index_compatibility_version" : "6.0.0-beta1"
  },
  "tagline" : "You Know, for Search"
}
Let’s check for internet connectivity from the container
bash-4.2$ curl -v 1.1.1.1
* About to connect() to 1.1.1.1 port 80 (#0)
*   Trying 1.1.1.1...
* Connected to 1.1.1.1 (1.1.1.1) port 80 (#0)
> GET / HTTP/1.1
> User-Agent: curl/7.29.0
> Host: 1.1.1.1
> Accept: */*
>
< HTTP/1.1 301 Moved Permanently
< Date: Sun, 31 May 2020 10:10:27 GMT
< Content-Type: text/html
< Transfer-Encoding: chunked
< Connection: keep-alive
< Location: https://1.1.1.1/
< Served-In-Seconds: 0.000
< CF-Cache-Status: HIT
< Age: 5334
< Expires: Sun, 31 May 2020 14:10:27 GMT
< Cache-Control: public, max-age=14400
< cf-request-id: 030bcf27a3000018e57f0f5200000001
< Server: cloudflare
< CF-RAY: 59bfe7b90b7518e5-FRA
<
<html>
<head><title>301 Moved Permanently</title></head>
<body bgcolor="white">
<center><h1>301 Moved Permanently</h1></center>
<hr><center>cloudflare-lb</center>
</body>
</html>
internet connectivity for the container works just fine. Let’s curl to another host in the same LAN on the same service port.
bash-4.2$ curl -v 172.31.45.101:9200
* About to connect() to 172.31.45.101 port 9200 (#0)
*   Trying 172.31.45.101...
* Connected to 172.31.45.101 (172.31.45.101) port 9200 (#0)
> GET / HTTP/1.1
> User-Agent: curl/7.29.0
> Host: 172.31.45.101:9200
> Accept: */*
>
< HTTP/1.1 200 OK
< content-type: application/json; charset=UTF-8
< content-length: 524
<
{
  "name" : "node2",
  "cluster_name" : "centos7",
  "cluster_uuid" : "d6fBSua6Q9OvSu534roTpA",
  "version" : {
    "number" : "7.7.0",
    "build_flavor" : "default",
    "build_type" : "rpm",
    "build_hash" : "81a1e9eda8e6183f5237786246f6dced26a10eaf",
    "build_date" : "2020-05-12T02:01:37.602180Z",
    "build_snapshot" : false,
    "lucene_version" : "8.5.1",
    "minimum_wire_compatibility_version" : "6.8.0",
    "minimum_index_compatibility_version" : "6.0.0-beta1"
  },
  "tagline" : "You Know, for Search"
}
That also works. Time to use the swiss army knife of network troubleshooting, tcpdump. If you want to find which veth interface a container uses you can either use dockerveth or use the following commands to figure it out manually.
Get the iflink of container’s eth0:
[root@ip-172-31-45-100 ~]# docker exec -it <container-name> bash -c 'cat /sys/class/net/eth0/iflink'
In this case that would be:
# docker exec -it kibana bash -c 'cat /sys/class/net/eth0/iflink'
41
then find the file name of the ifindex that contains that link number in `/sys/class/net/veth*/ifindex` of the host
[root@ip-172-31-45-100 ~]# grep -lw 41 /sys/class/net/veth*/ifindex
/sys/class/net/veth0006ca6/ifindex
`veth0006ca6` is what we need to use. Let’s run tcpdump on it
[root@ip-172-31-45-100 ~]# tcpdump -nni veth0006ca6
10:06:16.745143 IP 172.17.0.2.47166 > 172.31.45.100.9200: Flags [S], seq 1062649548, win 29200, options [mss 1460,sackOK,TS val 1781316 ecr 0,nop,wscale 7], length 0
10:06:16.749126 IP 172.17.0.2.47168 > 172.31.45.100.9200: Flags [S], seq 4174345004, win 29200, options [mss 1460,sackOK,TS val 1781320 ecr 0,nop,wscale 7], length 0
10:06:16.749131 IP 172.17.0.2.47170 > 172.31.45.100.9200: Flags [S], seq 1386880792, win 29200, options [mss 1460,sackOK,TS val 1781320 ecr 0,nop,wscale 7], length 0
the syn packet is seen going out of the container’s veth interface. So let’s tcpdump on docker0
[root@ip-172-31-45-100 ~]# tcpdump -nni docker0
10:07:07.813153 IP 172.17.0.2.47148 > 172.31.45.100.9200: Flags [S], seq 4114480937, win 29200, options [mss 1460,sackOK,TS val 1396384 ecr 0,nop,wscale 7], length 0
10:07:07.845141 IP 172.17.0.2.47144 > 172.31.45.100.9200: Flags [S], seq 3273546229, win 29200, options [mss 1460,sackOK,TS val 1412416 ecr 0,nop,wscale 7], length 0
10:07:07.845147 IP 172.17.0.2.47146 > 172.31.45.100.9200: Flags [S], seq 2062214864, win 29200, options [mss 1460,sackOK,TS val 1412416 ecr 0,nop,wscale 7], length 0
the syn packet can also be seen on the docker0 bridge. The syn packet cannot be seen on the interface (ens5) that has the service IP (172.31.45.100) on it, since it doesn’t traverse that link to go outside the host.
[root@ip-172-31-45-100 ~]# tcpdump -nni ens5 port 9200 or icmp
tcpdump: verbose output suppressed, use -v or -vv for full protocol decode
listening on ens5, link-type EN10MB (Ethernet), capture size 262144 bytes
Let’s check routing entries.
[root@ip-172-31-45-100 ~]# ip route ls
default via 172.31.32.1 dev ens5
172.17.0.0/16 dev docker0 proto kernel scope link src 172.17.0.1
172.31.32.0/20 dev ens5 proto kernel scope link src 172.31.45.100
Nothing interesting here at all. Time to check iptables.
[root@ip-172-31-45-100 ~]# iptables -nxvL
Chain INPUT (policy ACCEPT 169 packets, 27524 bytes)
    pkts      bytes target     prot opt in     out     source               destination

Chain FORWARD (policy DROP 0 packets, 0 bytes)
    pkts      bytes target     prot opt in     out     source               destination
     368    27870 DOCKER-ISOLATION  all  --  *      *       0.0.0.0/0            0.0.0.0/0
     184    14254 DOCKER     all  --  *      docker0  0.0.0.0/0            0.0.0.0/0
     184    14254 ACCEPT     all  --  *      docker0  0.0.0.0/0            0.0.0.0/0            ctstate RELATED,ESTABLISHED
     184    13616 ACCEPT     all  --  docker0 !docker0  0.0.0.0/0            0.0.0.0/0
       0        0 ACCEPT     all  --  docker0 docker0  0.0.0.0/0            0.0.0.0/0

Chain OUTPUT (policy ACCEPT 109 packets, 10788 bytes)
    pkts      bytes target     prot opt in     out     source               destination

Chain DOCKER (1 references)
    pkts      bytes target     prot opt in     out     source               destination

Chain DOCKER-ISOLATION (1 references)
    pkts      bytes target     prot opt in     out     source               destination
     368    27870 RETURN     all  --  *      *       0.0.0.0/0            0.0.0.0/0

[root@ip-172-31-45-100 ~]# iptables -nxvL -t nat
Chain PREROUTING (policy ACCEPT 0 packets, 0 bytes)
    pkts      bytes target     prot opt in     out     source               destination
     204    12200 DOCKER     all  --  *      *       0.0.0.0/0            0.0.0.0/0            ADDRTYPE match dst-type LOCAL

Chain INPUT (policy ACCEPT 0 packets, 0 bytes)
    pkts      bytes target     prot opt in     out     source               destination

Chain OUTPUT (policy ACCEPT 6 packets, 456 bytes)
    pkts      bytes target     prot opt in     out     source               destination
       0        0 DOCKER     all  --  *      *       0.0.0.0/0           !127.0.0.0/8          ADDRTYPE match dst-type LOCAL

Chain POSTROUTING (policy ACCEPT 6 packets, 456 bytes)
    pkts      bytes target     prot opt in     out     source               destination
      92     6808 MASQUERADE  all  --  *      !docker0  172.17.0.0/16        0.0.0.0/0

Chain DOCKER (2 references)
    pkts      bytes target     prot opt in     out     source               destination
     191    11460 RETURN     all  --  docker0 *       0.0.0.0/0            0.0.0.0/0

[root@ip-172-31-45-100 ~]# iptables -nxvL -t mangle
Chain PREROUTING (policy ACCEPT 0 packets, 0 bytes)
    pkts      bytes target     prot opt in     out     source               destination

Chain INPUT (policy ACCEPT 0 packets, 0 bytes)
    pkts      bytes target     prot opt in     out     source               destination

Chain FORWARD (policy ACCEPT 0 packets, 0 bytes)
    pkts      bytes target     prot opt in     out     source               destination

Chain OUTPUT (policy ACCEPT 0 packets, 0 bytes)
    pkts      bytes target     prot opt in     out     source               destination

Chain POSTROUTING (policy ACCEPT 0 packets, 0 bytes)
    pkts      bytes target     prot opt in     out     source               destination
There’s not even a DROP rule at all and all the policies are set to ACCEPT. iptables is definitely not dropping the connection. Even if there was a DROP rule, we would see the packet on tcpdump…so where’s the packet going ?
Let’s add an extra rule for both FORWARD and INPUT chains just to see if iptables can match these rules as the packets are passing by.
[root@ip-172-31-45-100 ~]# iptables -I INPUT -p tcp --dport 9200
[root@ip-172-31-45-100 ~]# iptables -I FORWARD -p tcp --dport 9200
wait for a while and then check the statistics of those 2 rules:
[root@ip-172-31-45-100 ~]# iptables -nxvL | grep 9200
       0        0            tcp  --  *      *       0.0.0.0/0            0.0.0.0/0            tcp dpt:9200
       0        0            tcp  --  *      *       0.0.0.0/0            0.0.0.0/0            tcp dpt:9200
no packets match these 2 rules at all! Time to inspect the container and the docker bridge network.
[root@ip-172-31-45-100 ~]# docker network inspect bridge
[
    {
        "Name": "bridge",
        "Id": "a6290df54ea24d14faa8d003d17802b3f8a4967680bc0c82c1211ab75d1815e2",
        "Created": "2020-05-31T09:40:19.81958733Z",
        "Scope": "local",
        "Driver": "bridge",
        "EnableIPv6": false,
        "IPAM": {
            "Driver": "default",
            "Options": null,
            "Config": [
                {
                    "Subnet": "172.17.0.0/16"
                }
            ]
        },
        "Internal": false,
        "Attachable": false,
        "Containers": {},
        "Options": {
            "com.docker.network.bridge.default_bridge": "true",
            "com.docker.network.bridge.enable_icc": "true",
            "com.docker.network.bridge.enable_ip_masquerade": "true",
            "com.docker.network.bridge.host_binding_ipv4": "0.0.0.0",
            "com.docker.network.bridge.name": "docker0",
            "com.docker.network.driver.mtu": "1500"
        },
        "Labels": {}
    }
]
pretty standard options for the bridge network, even `enable_icc` is set to `true`. What about the container though ?
[root@ip-172-31-45-100 ~]# docker inspect kibana
[
    {
        "Id": "2f08cc190b760361d9aa2951b4c9c407561fe35b8dbdc003f3f535719456f460",
        "Created": "2020-05-31T10:24:11.942315341Z",
        "Path": "/usr/local/bin/dumb-init",
        "Args": [
            "--",
            "/usr/local/bin/kibana-docker"
        ],
        "State": {
            "Status": "running",
            "Running": true,
            "Paused": false,
            "Restarting": false,
            "OOMKilled": false,
            "Dead": false,
            "Pid": 3735,
            "ExitCode": 0,
            "Error": "",
            "StartedAt": "2020-05-31T10:24:12.329214827Z",
            "FinishedAt": "0001-01-01T00:00:00Z"
        },
        "Image": "sha256:eadc7b3d59dd47b1b56f280732f38d16a4b31947cbc758516adbe1df5472b407",
        "ResolvConfPath": "/var/lib/docker/containers/2f08cc190b760361d9aa2951b4c9c407561fe35b8dbdc003f3f535719456f460/resolv.conf",
        "HostnamePath": "/var/lib/docker/containers/2f08cc190b760361d9aa2951b4c9c407561fe35b8dbdc003f3f535719456f460/hostname",
        "HostsPath": "/var/lib/docker/containers/2f08cc190b760361d9aa2951b4c9c407561fe35b8dbdc003f3f535719456f460/hosts",
        "LogPath": "",
        "Name": "/kibana",
        "RestartCount": 0,
        "Driver": "overlay2",
        "MountLabel": "system_u:object_r:svirt_sandbox_file_t:s0:c434,c792",
        "ProcessLabel": "system_u:system_r:svirt_lxc_net_t:s0:c434,c792",
        "AppArmorProfile": "",
        "ExecIDs": null,
        "HostConfig": {
            "Binds": null,
            "ContainerIDFile": "",
            "LogConfig": {
                "Type": "journald",
                "Config": {}
            },
            "NetworkMode": "bridge",
            "PortBindings": {
                "5601/tcp": [
                    {
                        "HostIp": "",
                        "HostPort": "5601"
                    }
                ]
            },
            "RestartPolicy": {
                "Name": "no",
                "MaximumRetryCount": 0
            },
            "AutoRemove": true,
            "VolumeDriver": "",
            "VolumesFrom": null,
            "CapAdd": null,
            "CapDrop": null,
            "Dns": [],
            "DnsOptions": [],
            "DnsSearch": [],
            "ExtraHosts": null,
            "GroupAdd": null,
            "IpcMode": "",
            "Cgroup": "",
            "Links": null,
            "OomScoreAdj": 0,
            "PidMode": "",
            "Privileged": false,
            "PublishAllPorts": false,
            "ReadonlyRootfs": false,
            "SecurityOpt": null,
            "UTSMode": "",
            "UsernsMode": "",
            "ShmSize": 67108864,
            "Runtime": "docker-runc",
            "ConsoleSize": [
                0,
                0
            ],
            "Isolation": "",
            "CpuShares": 0,
            "Memory": 0,
            "NanoCpus": 0,
            "CgroupParent": "",
            "BlkioWeight": 0,
            "BlkioWeightDevice": null,
            "BlkioDeviceReadBps": null,
            "BlkioDeviceWriteBps": null,
            "BlkioDeviceReadIOps": null,
            "BlkioDeviceWriteIOps": null,
            "CpuPeriod": 0,
            "CpuQuota": 0,
            "CpuRealtimePeriod": 0,
            "CpuRealtimeRuntime": 0,
            "CpusetCpus": "",
            "CpusetMems": "",
            "Devices": [],
            "DiskQuota": 0,
            "KernelMemory": 0,
            "MemoryReservation": 0,
            "MemorySwap": 0,
            "MemorySwappiness": -1,
            "OomKillDisable": false,
            "PidsLimit": 0,
            "Ulimits": null,
            "CpuCount": 0,
            "CpuPercent": 0,
            "IOMaximumIOps": 0,
            "IOMaximumBandwidth": 0
        },
        "GraphDriver": {
            "Name": "overlay2",
            "Data": {
                "LowerDir": "/var/lib/docker/overlay2/84217deb518fa6b50fb38aab03aa6a819150e0a248cf233bda8091b136c4825a-init/diff:/var/lib/docker/overlay2/bfda0aa2ec51f7047b5694e5daf89735f3021691e6154bc370827c168c4572f0/diff:/var/lib/docker/overlay2/5d32d74a3bb95b8e3377b1c115622f12a817a591936c4ae2da4512bc2e281e4b/diff:/var/lib/docker/overlay2/6482e711a89a90bebd61834aa8bd3463f567684dd3cdbbf2698179b752fdad7b/diff:/var/lib/docker/overlay2/4ae81e6a07956c974d985674c35e113ad3fbd9f4fdde43f4752c0e36a1153e69/diff:/var/lib/docker/overlay2/8330cdd839ec316133d659805f2839d1e65b16fbf7035324f419c2aa8d097925/diff:/var/lib/docker/overlay2/cd377c8c6fb23d050771d55ca15253cc9fa5043c7e49f41a2f73acd25f8e7ca9/diff:/var/lib/docker/overlay2/408c72d7e496be76503bbb01d5248c25be98e2290d71cae83d8d5d09d714f81d/diff:/var/lib/docker/overlay2/20068d51c4dd214db7b2b9d30fe13feb2e8ab35de646c9b652fea255476d396b/diff:/var/lib/docker/overlay2/0fdedfd6dbb551d32a9e826188a74936d0cec56e97c1b917fdd04b0e49a59a70/diff:/var/lib/docker/overlay2/0238ff31fbd60fdeaee1e162c92a1aa46735ec7b17df3b11455c09f18657c30f/diff:/var/lib/docker/overlay2/99a7a64a569e5e524e4139f9cf95bd929744c85c1633bcd8173c9172756c3233/diff",
                "MergedDir": "/var/lib/docker/overlay2/84217deb518fa6b50fb38aab03aa6a819150e0a248cf233bda8091b136c4825a/merged",
                "UpperDir": "/var/lib/docker/overlay2/84217deb518fa6b50fb38aab03aa6a819150e0a248cf233bda8091b136c4825a/diff",
                "WorkDir": "/var/lib/docker/overlay2/84217deb518fa6b50fb38aab03aa6a819150e0a248cf233bda8091b136c4825a/work"
            }
        },
        "Mounts": [],
        "Config": {
            "Hostname": "2f08cc190b76",
            "Domainname": "",
            "User": "kibana",
            "AttachStdin": false,
            "AttachStdout": true,
            "AttachStderr": true,
            "ExposedPorts": {
                "5601/tcp": {}
            },
            "Tty": false,
            "OpenStdin": false,
            "StdinOnce": false,
            "Env": [
                "ELASTICSEARCH_HOSTS=http://172.31.45.100:9200",
                "PATH=/usr/share/kibana/bin:/usr/local/sbin:/usr/local/bin:/usr/sbin:/usr/bin:/sbin:/bin",
                "ELASTIC_CONTAINER=true"
            ],
            "Cmd": [
                "/usr/local/bin/kibana-docker"
            ],
            "Image": "docker.elastic.co/kibana/kibana:7.7.0",
            "Volumes": null,
            "WorkingDir": "/usr/share/kibana",
            "Entrypoint": [
                "/usr/local/bin/dumb-init",
                "--"
            ],
            "OnBuild": null,
            "Labels": {
                "license": "Elastic License",
                "org.label-schema.build-date": "2020-05-12T03:25:49.654Z",
                "org.label-schema.license": "Elastic License",
                "org.label-schema.name": "kibana",
                "org.label-schema.schema-version": "1.0",
                "org.label-schema.url": "https://www.elastic.co/products/kibana",
                "org.label-schema.usage": "https://www.elastic.co/guide/en/kibana/index.html",
                "org.label-schema.vcs-url": "https://github.com/elastic/kibana",
                "org.label-schema.vendor": "Elastic",
                "org.label-schema.version": "7.7.0",
                "org.opencontainers.image.created": "2020-05-04 00:00:00+01:00",
                "org.opencontainers.image.licenses": "GPL-2.0-only",
                "org.opencontainers.image.title": "CentOS Base Image",
                "org.opencontainers.image.vendor": "CentOS"
            }
        },
        "NetworkSettings": {
            "Bridge": "",
            "SandboxID": "258a4a11f55f7425b837c7d5c0420dd344add081be79da7e33c146501dd8f0ec",
            "HairpinMode": false,
            "LinkLocalIPv6Address": "",
            "LinkLocalIPv6PrefixLen": 0,
            "Ports": {
                "5601/tcp": [
                    {
                        "HostIp": "0.0.0.0",
                        "HostPort": "5601"
                    }
                ]
            },
            "SandboxKey": "/var/run/docker/netns/258a4a11f55f",
            "SecondaryIPAddresses": null,
            "SecondaryIPv6Addresses": null,
            "EndpointID": "7126885dddf9ff031f2ff8c3b2cbd14708391dae619020bdb40efe7a849a01c7",
            "Gateway": "172.17.0.1",
            "GlobalIPv6Address": "",
            "GlobalIPv6PrefixLen": 0,
            "IPAddress": "172.17.0.2",
            "IPPrefixLen": 16,
            "IPv6Gateway": "",
            "MacAddress": "02:42:ac:11:00:02",
            "Networks": {
                "bridge": {
                    "IPAMConfig": null,
                    "Links": null,
                    "Aliases": null,
                    "NetworkID": "a6290df54ea24d14faa8d003d17802b3f8a4967680bc0c82c1211ab75d1815e2",
                    "EndpointID": "7126885dddf9ff031f2ff8c3b2cbd14708391dae619020bdb40efe7a849a01c7",
                    "Gateway": "172.17.0.1",
                    "IPAddress": "172.17.0.2",
                    "IPPrefixLen": 16,
                    "IPv6Gateway": "",
                    "GlobalIPv6Address": "",
                    "GlobalIPv6PrefixLen": 0,
                    "MacAddress": "02:42:ac:11:00:02"
                }
            }
        }
    }
]
all looks very normal regarding the docker container. Let’s check sysctl settings in /etc
[root@ip-172-31-45-100 ~]# ls -Fla /etc/sysctl.d/
total 12
drwxr-xr-x.  2 root root   28 May 31 09:34 ./
drwxr-xr-x. 84 root root 8192 May 31 10:15 ../
lrwxrwxrwx.  1 root root   14 May 31 09:34 99-sysctl.conf -> ../sysctl.conf

[root@ip-172-31-45-100 ~]# cat /etc/sysctl.d/99-sysctl.conf

# sysctl settings are defined through files in
# /usr/lib/sysctl.d/, /run/sysctl.d/, and /etc/sysctl.d/.
#
# Vendors settings live in /usr/lib/sysctl.d/.
# To override a whole file, create a new file with the same in
# /etc/sysctl.d/ and put new settings there. To override
# only specific settings, add a file with a lexically later
# name in /etc/sysctl.d/ and put new settings there.
#
# For more information, see sysctl.conf(5) and sysctl.d(5).
nothing interesting here as well. What if someone has messed up ip forwarding via other means though ?
[root@ip-172-31-45-100 ~]# sysctl -a 2>/dev/null| grep forward | grep -v ipv6
net.ipv4.conf.all.forwarding = 1
net.ipv4.conf.all.mc_forwarding = 0
net.ipv4.conf.default.forwarding = 1
net.ipv4.conf.default.mc_forwarding = 0
net.ipv4.conf.docker0.forwarding = 1
net.ipv4.conf.docker0.mc_forwarding = 0
net.ipv4.conf.ens5.forwarding = 1
net.ipv4.conf.ens5.mc_forwarding = 0
net.ipv4.conf.lo.forwarding = 1
net.ipv4.conf.lo.mc_forwarding = 0
net.ipv4.ip_forward = 1
net.ipv4.ip_forward_use_pmtu = 0
all looks fine here too. Let’s check some more sysctl settings regarding bridge + iptables
[root@ip-172-31-45-100 ~]# sysctl -a 2>/dev/null| grep bridge
net.bridge.bridge-nf-call-arptables = 1
net.bridge.bridge-nf-call-ip6tables = 1
net.bridge.bridge-nf-call-iptables = 1
net.bridge.bridge-nf-filter-pppoe-tagged = 0
net.bridge.bridge-nf-filter-vlan-tagged = 0
net.bridge.bridge-nf-pass-vlan-input-dev = 0
everything still looks fine in these configuration settings, but the packets from the container still can’t reach the host.
Next step is to setup a netcat listening service on the host on a different port and try to connect to it via the container. That still doesn’t work, no packets to be seen on ens5.
Could it be ebtables ? No..no way..but what if…
[root@ip-172-31-45-100 ~]# ebtables -L
Bridge table: filter
Bridge chain: INPUT, entries: 0, policy: ACCEPT
Bridge chain: FORWARD, entries: 0, policy: ACCEPT
Bridge chain: OUTPUT, entries: 0, policy: ACCEPT
still nothing interesting. Could it be a kernel bug ? is this some custom kernel ?
[root@ip-172-31-45-100 ~]# uname -a
Linux ip-172-31-45-100.eu-central-1.compute.internal 3.10.0-1062.12.1.el7.x86_64 #1 SMP Tue Feb 4 23:02:59 UTC 2020 x86_64 x86_64 x86_64 GNU/Linux
nope…that’s a vanilla centos7 kernel. Could it be nftables ? On 3.10 kernel and centos7 ?
[root@ip-172-31-45-100 ~]# nft list tables
-bash: nft: command not found
Nobody uses nftables yet, right ? Another wild thought, are there any ip rules defined ?
[root@ip-172-31-45-100 ~]# ip rule ls
0:    from all lookup local
100:    from 172.31.45.100 lookup 1
32766:    from all lookup main
32767:    from all lookup default
bingo, there’s a rule with priority 100 that matches the host’s IP address! What is this ip rule doing there ? Let’s check routing table 1 that the lookup of rule 100 points to
[root@ip-172-31-45-100 ~]# ip route ls table 1
default via 172.31.32.1 dev ens5
172.31.32.0/20 dev ens5 scope link
at last, here’s the answer!
There’s an IP rule entry that says that packets with a source IP of the ens5 interface should lookup routing entries only in routing table 1, which is not the main routing table. That routing table knows nothing about the docker network (172.17.0.0/16). Let’s delete the rule from the host
[root@ip-172-31-45-100 ~]# ip rule del from 172.31.45.100/32 tab 1 priority 100
and check if the container can contact the service now
(container) bash-4.2$ curl 172.31.45.100:9200
{
  "name" : "node1",
  "cluster_name" : "centos7",
  "cluster_uuid" : "d6fBSua6Q9OvSu534roTpA",
  "version" : {
    "number" : "7.7.0",
    "build_flavor" : "default",
    "build_type" : "rpm",
    "build_hash" : "81a1e9eda8e6183f5237786246f6dced26a10eaf",
    "build_date" : "2020-05-12T02:01:37.602180Z",
    "build_snapshot" : false,
    "lucene_version" : "8.5.1",
    "minimum_wire_compatibility_version" : "6.8.0",
    "minimum_index_compatibility_version" : "6.0.0-beta1"
  },
  "tagline" : "You Know, for Search"
}
Success!
Where’s the SYN+ACK ?
Does the SYN packet reach the listening service ? No…and the reason is rp_filter. Centos7 sets net.ipv4.conf.default.rp_filter=1, so when docker0 interface gets created it is set to net.ipv4.conf.docker0.rp_filter=1.
Here’s what rp_filter values mean according to kernel documentation:
- 0 – No source validation.
- 1 – Strict mode as defined in RFC3704 Strict Reverse Path Each incoming packet is tested against the FIB and if the interface is not the best reverse path the packet check will fail. By default failed packets are discarded.
- 2 – Loose mode as defined in RFC3704 Loose Reverse Path Each incoming packet’s source address is also tested against the FIB and if the source address is not reachable via any interface the packet check will fail.
After reverting the deleted ip rule via ip rule add from 172.31.45.100/32 tab 1 priority 100 and setting sysctl -w net.ipv4.conf.docker0.rp_filter=0 we can see the SYN+ACK packet going out of ens5 interface towards the default gateway.
[root@ip-172-31-45-100 ~]# tcpdump -enni ens5 port 9200
tcpdump: verbose output suppressed, use -v or -vv for full protocol decode
listening on ens5, link-type EN10MB (Ethernet), capture size 262144 bytes
15:44:19.028353 06:ce:3b:94:fe:ac > 06:1b:e5:19:30:12, ethertype IPv4 (0x0800), length 74: 172.31.45.100.9200 > 172.17.0.2.47460: Flags [S.], seq 1431574088, ack 1879007024, win 26847, options [mss 8961,sackOK,TS val 22063599 ecr 22063599,nop,wscale 7], length 0
15:44:20.029163 06:ce:3b:94:fe:ac > 06:1b:e5:19:30:12, ethertype IPv4 (0x0800), length 74: 172.31.45.100.9200 > 172.17.0.2.47460: Flags [S.], seq 1431574088, ack 1879007024, win 26847, options [mss 8961,sackOK,TS val 22064600 ecr 22063599,nop,wscale 7], length 0
15:44:21.229126 06:ce:3b:94:fe:ac > 06:1b:e5:19:30:12, ethertype IPv4 (0x0800), length 74: 172.31.45.100.9200 > 172.17.0.2.47460: Flags [S.], seq 1431574088, ack 1879007024, win 26847, options [mss 8961,sackOK,TS val 22065800 ecr 22063599,nop,wscale 7], length 0
Finding such discarded packets, called martians, in the logs can be done by enabling log_martians via sysctl -w net.ipv4.conf.all.log_martians=1. Example syslog message:
May 31 16:01:08 ip-172-31-45-100 kernel: IPv4: martian source 172.31.45.100 from 172.17.0.2, on dev docker018
May 31 16:01:08 ip-172-31-45-100 kernel: ll header: 00000000: 02 42 e9 38 3d a8 02 42 ac 11 00 02 08 00 .B.8=..B......
But why ?
Why was the rule there in the original case ? Multihoming was tried, it didn’t work as expected and not all the configs were removed. Grep-ing /etc for the host’s IP found the following file:
/etc/sysconfig/network-scripts/rule-ens5:from 172.31.45.100/32 tab 1 priority 100
In multihoming it’s common that packets reaching a host on interface X should also be replied back from interface X. Part of a method to achieve this is to assign each interface its own routing table.
So when asked to troubleshoot networking issues act like Dr. House would, assume the worst.
P.S. thanks to Markos for the comments on improving the blogpost
 Filed by kargig at 11:58 under General,Work
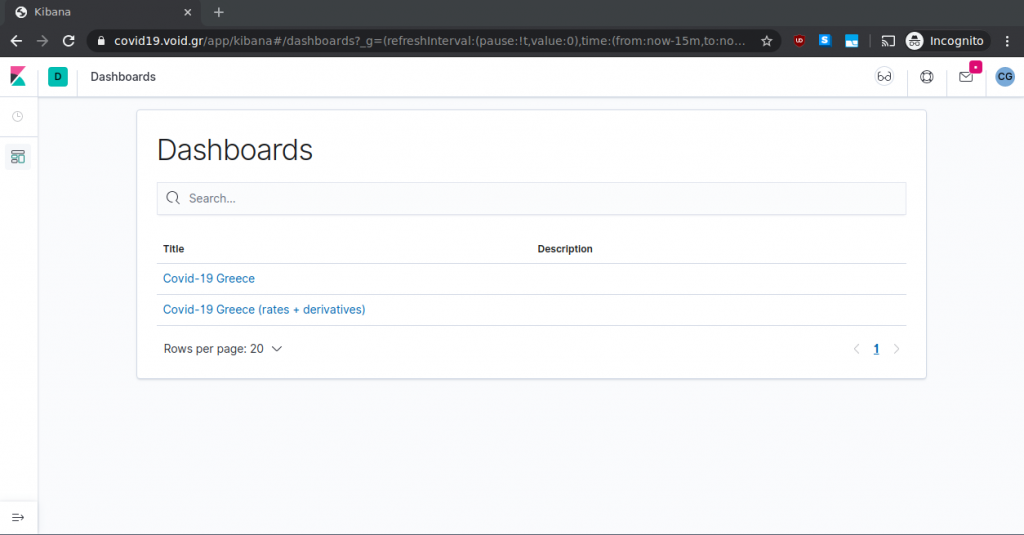
 4 Comments